

Installing a custom switch panel can significantly enhance the functionality and aesthetics of your vehicle or home automation system. A well-designed switch panel not only centralizes control over multiple electrical circuits but also provides an organized way to manage your wiring and switches. In this guide, we will walk you through the essential steps to successfully install your custom switch panel.
Before diving into the installation process, it’s important to understand the fundamental components involved. The switch panel will typically include several switches that control various devices or circuits. Proper wiring is crucial to ensure that each switch functions as intended and does not interfere with others. You’ll need to carefully plan the layout of your switches according to the devices they will control, ensuring that the wiring is clean and accessible.
As you prepare for installation, consider the materials and tools required for the task. This guide will outline the necessary components, including switches, wire connectors, and tools such as screwdrivers and wire strippers. By following this guide, you will be equipped with the knowledge needed to achieve a functional and stylish custom switch panel that meets your specific needs.
Choosing the Right Location for Your Switch Panel
When installing a custom switch panel, selecting an appropriate location is crucial for functionality and convenience. First, consider the purpose of the panel. Identify which devices you will be controlling and position the panel accordingly to minimize wiring lengths and complexities.
Accessibility is another key factor. Ensure the panel is easily reachable for daily use, whether it’s mounted on a wall or integrated into a dashboard. Avoid placing it in tight spaces where maneuvering might be difficult. Additionally, think about the aesthetic aspect; the panel should complement the surrounding area without obstructing other controls.
Evaluate the proximity to existing wiring. If possible, choose a location close to where the electrical sources converge, reducing the need for extensive modifications or additional wiring. Planning the layout in advance helps streamline the process and enhances safety by minimizing potential hazards.
Lastly, consider environmental factors. Avoid locations exposed to moisture or extreme temperatures, as these conditions can affect the performance and longevity of the switch panel. By choosing the right location, you ensure not only efficient operation but also a seamless integration into your overall system.
Deciding on the Number of Switches and Functions
When creating a custom switch panel, one of the critical decisions involves determining the number of switches and their respective functions. A well-planned panel can enhance functionality and user experience. Here are some considerations to guide your decision-making process:
- Assess Your Needs: Identify the devices or systems you want to control. This could include lighting, fans, appliances, or other equipment.
- Future Expansion: Consider potential future needs. Planning for extra switches can save time and resources later.
- Switch Types: Different functions may require various types of switches, such as toggle, dimmer, or momentary switches. Make sure to select the appropriate type for each function.
- Layout and Accessibility: Design the layout of the panel keeping in mind user accessibility and ease of use. Ensure that the most frequently used switches are easily reachable.
- Group Similar Functions: Group switches that operate similar functions together to streamline usage and improve organization.
After assessing your needs, create a list of all the functions you wish to include:
- Lighting Control
- Heating/Cooling Systems
- Appliance Control
- Security Systems
- Entertainment Systems
- Miscellaneous Controls (e.g., fans, pumps)
Once you have compiled your list, evaluate the complexity of each function. Some may require dedicated switches, while others could be integrated into multi-function switches. Keep in mind the technical aspects of installation, such as wiring and circuit load, when deciding on the final number of switches.
Ultimately, a well-designed switch panel catering to your specific needs can significantly enhance your space’s functionality and ensure a smoother user experience.
Gathering Necessary Tools and Materials for Installation
Before starting the installation of your custom switch panel, it is essential to gather all necessary tools and materials to ensure a smooth and efficient process. Below is a comprehensive list of items you will require:
| Item | Description |
|---|---|
| Wire Strippers | Used to strip the insulation from electrical wiring, allowing for proper connection to the switch panel. |
| Screwdriver Set | A collection of various screwdrivers (flathead and Phillips) needed to secure the panel and components. |
| Drill | A power tool for making holes in the mounting surface for screws and anchors. |
| Wire Connectors | Used to join multiple pieces of wiring securely, ensuring safe and reliable connections. |
| Electrical Tape | A type of insulating tape that helps to secure wiring and improve safety by preventing short circuits. |
| Switch Panel | The custom panel that you will install, which houses the switches for controlling various functions. |
| Wiring Harness | A pre-assembled set of wires that connects to the switches and simplifies the installation process. |
| Markers | For marking the installation position on the surface, ensuring accuracy during the fitting process. |
| Multimeter | A tool used for testing electrical connections and ensuring the correct voltage before finalizing the installation. |
By gathering these tools and materials beforehand, you will be well-prepared to complete the installation of your custom switch panel efficiently and effectively. Ensure that all components are compatible with your specific wiring and electrical requirements before proceeding.
Wiring Configuration and Safety Precautions
When installing a custom switch panel, proper wiring configuration is crucial to ensure functionality and safety. Start by disconnecting the power supply to prevent any electrical shock. Use insulated tools to handle wires and minimize the risk of short circuits.
Identify the type of switches you are using in the panel. Typically, each switch will have a common terminal and typically two or more load terminals. Make sure to follow the manufacturer’s wiring diagram closely to avoid misconfigurations. The common terminal should connect to the power source, while the load terminals will connect to the devices being controlled.
It’s important to use appropriately rated wires for your setup. Consider the amperage of the switches and the devices to prevent overheating. For most applications, at least 16 to 14-gauge wire is recommended, depending on the load. Ensure that all connections are secure and use wire connectors or soldering for lasting connections.
Label each wire according to its function–power, load, and ground. This practice aids in troubleshooting and future maintenance. Additionally, ensure that the ground wire is connected properly to the switch panel, reducing the risk of electrical shocks.
Before finalizing the installation, double-check all connections for consistency with the plans. After confirming the wiring is correct, restore power to the system and test each switch to ensure they operate as intended. If any issues arise, disconnect power immediately and review the wiring configuration again.
Finally, remember that safety should always be your top priority. If in doubt about any aspect of the wiring process, consult a licensed electrician. Following these guidelines will help achieve a functional and safe custom switch panel installation.
Installing the Switch Panel: Step-by-Step Process
Installing a custom switch panel involves careful planning and execution to ensure functionality and safety. Follow these steps for a successful installation.
Step 1: Gather Necessary Tools and Materials
Before you begin, collect all necessary tools and materials, including the switch panel, screws, a screwdriver, wire strippers, and electrical tape. Having everything on hand will streamline the installation process.
Step 2: Prepare the Area
Choose a suitable location for your switch panel. Ensure that the area is clean and free from obstructions. It’s also essential to ensure that the panel is accessible yet does not interfere with other components of your setup.
Step 3: Power Off the Electrical System
Before you start wiring, turn off the power to the electrical system to prevent any accidents. This step is crucial for your safety while handling electrical components.
Step 4: Mount the Switch Panel
Align the switch panel with the pre-drilled holes or marks on the surface. Using screws, attach the panel securely to the chosen location. Ensure it is level and stable, as this will affect its usability.
Step 5: Wire the Switches
Connect the wires to each switch according to the manufacturer’s instructions. Strip the ends of the wires, and ensure a solid connection by twisting them securely or using connectors as needed. Follow a consistent color code for wiring to avoid confusion.
Step 6: Test Connections
Once all switches are wired, double-check each connection for accuracy. This is a critical step; any mistake can lead to malfunction. Use a multimeter to verify that there are no short circuits.
Step 7: Restore Power and Test the Panel
Turn the power back on and carefully test each switch to confirm that they operate correctly. If any switch does not function as intended, re-evaluate the wiring connections.
Step 8: Finalize the Installation
After confirming that the panel works properly, tidy up the wiring. Use electrical tape to secure any loose wires, and ensure that everything is organized to prevent future issues.
By following these steps, you can successfully install a custom switch panel tailored to your specific needs. Proper installation will enhance both the usability and aesthetics of your electrical setup.
Testing and Troubleshooting Your Custom Switch Panel
After you have completed the installation of your custom switch panel, it’s crucial to ensure that everything functions correctly. Testing and troubleshooting your wiring are essential steps that will help you identify any potential issues before they become serious problems.
Testing Your Switch Panel
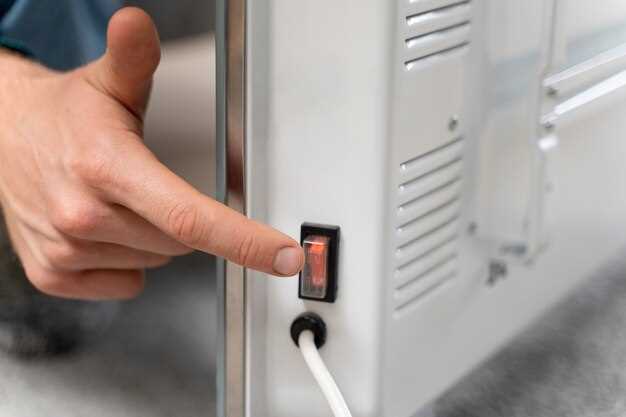
Begin the testing process by double-checking all the connections in your wiring. Ensure that each wire is firmly connected and that there are no exposed strands that could lead to short circuits. Once you confirm the physical integrity of your panel, proceed to power it up. Use a multimeter to measure voltage at each switch to verify that current is reaching the panel as intended.
If your switch panel includes indicator lights, check their functionality by activating each switch. If a light does not turn on, it could indicate a faulty switch or a problem within the wiring leading to that particular circuit.
Troubleshooting Common Issues
If you encounter problems during testing, start with the most straightforward solutions. Check for any blown fuses or tripped circuit breakers that may be preventing power from reaching your panel. If the wiring appears intact but there is still no power, trace the wires back to their source to identify any loose connections or damaged wires.
In case switches are non-responsive, remove the panel’s cover and inspect the internal wiring for signs of wear, fraying, or improper connections. Pay close attention to ground connections, as poor grounding can lead to various electrical issues.
If you’re still having trouble after these checks, consider using a process of elimination by isolating sections of the wiring. Disconnect individual switches and test them one at a time to identify any malfunctioning components. This method can save time and pinpoint the exact cause of the issue.
Lastly, keep in mind that some problems may arise from the electrical source itself. Make sure that your power supply is functioning correctly and compatible with your custom switch panel requirements.
By carefully testing and troubleshooting your wiring and panel, you can ensure a reliable and efficient operation of your custom switch panel for years to come.