

Understanding the importance of regular inspection of brake systems is crucial for any vehicle owner. The brake system serves as a vital component of automotive safety, and identifying issues early can prevent accidents and costly repairs. With just a few basic tools, you can efficiently perform a thorough inspection of your brake system at home.
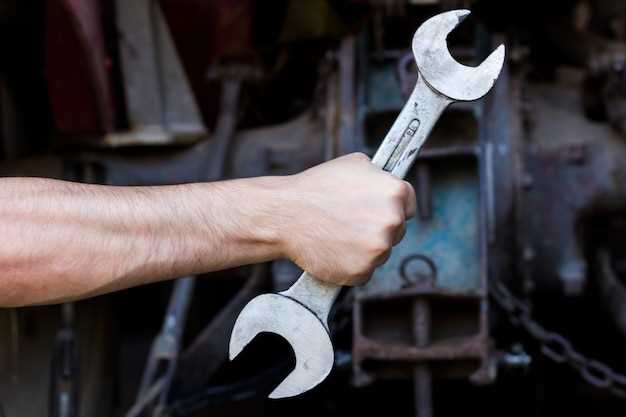
In this article, we will guide you through the essential steps for inspecting your brake components. By employing basic tools such as a jack, lug wrench, and brake gauge, you will be able to assess the condition of your brake pads, rotors, and fluid levels. Understanding how to properly utilize these tools will not only empower you to maintain your vehicle effectively but also enhance your overall knowledge of automotive care.
By taking the time to learn how to inspect your brake system, you can ensure that it operates smoothly and reliably. Regular attention to this critical safety feature will ultimately lead to a safer driving experience and extend the lifespan of your vehicle’s braking components. Get ready to dive into the essential practices that will keep your brake system in optimal condition!
Essential Tools for Brake Inspection
When it comes to inspecting brake systems, having the right tools is crucial for ensuring safety and efficiency. Below are some of the essential tools you need to perform a thorough brake inspection.
1. Brake Pad Gauge: This tool measures the thickness of the brake pads. It helps determine whether the pads are worn down and need replacement. Regular checks with this gauge can prevent brake failure.
2. Torque Wrench: A torque wrench allows you to apply the correct amount of force to the bolts when reassembling brake components. This is vital for ensuring that everything is securely fastened, which affects the overall performance of the braking system.
3. Brake Fluid Tester: This tool checks the moisture content in brake fluid. Since brake fluid can absorb moisture, using a tester ensures that the fluid’s effectiveness isn’t compromised, which could lead to brake failure.
4. C-Clamp or Brake Piston Tool: A C-clamp is used to retract the brake piston when changing brake pads. Alternatively, a specialized brake piston tool can make the job easier and safer, ensuring the piston is properly pushed back without damage.
5. Vehicle Jack and Jack Stands: Working on brakes requires lifting the vehicle to access the wheels. A quality vehicle jack, along with sturdy jack stands, is essential for safely elevating the car during inspection.
6. Flashlight: Adequate lighting is key to inspecting brake components thoroughly. A bright flashlight allows you to see into tight spaces and check for signs of wear or damage effectively.
Having these tools at your disposal will make brake inspection a more efficient and safe process. Regular maintenance and inspection can extend the life of your brakes and enhance vehicle safety.
Step-by-Step Guide to Visual Brake Check
Performing a visual brake inspection is essential for maintaining vehicle safety and performance. Follow these steps to effectively check your brake system using basic tools.
First, ensure your vehicle is parked on a flat surface and the ignition is off. Engage the parking brake to prevent any movement during the inspection. It is advisable to wear gloves and safety glasses for protection.
Begin by inspecting the brake pads. Look through the wheel spokes to see the brake calipers and pads. Check for any signs of wear, such as thinning pads or cracked surfaces. If the pads appear to be less than a quarter of an inch thick, they likely need replacement.
Next, examine the brake rotors. Look for any grooves, rust, or discoloration on the rotor surface. A smooth, clean surface is ideal. If you notice significant scoring or uneven wear, the rotors may need resurfacing or replacement.
Moving on, inspect the brake lines and hoses. Look for any leaks, cracks, or bulges. Damaged brake lines can lead to brake failure, so they must be replaced immediately if any issues are detected.
Check the brake fluid level in the reservoir. A low level may indicate leaks or worn brake pads. Ensure the fluid is clear and free of contaminants. If the fluid is dark or contaminated, it should be flushed and replaced.
Finally, inspect the brake pedal feel. With the engine off, press the brake pedal. It should feel firm with minimal travel. If the pedal sinks to the floor or feels spongy, it may indicate a problem with the brake system that requires further inspection.
After completing the visual inspection, document any findings. If you discover issues that require attention, consult a professional mechanic for further evaluation and repairs. Regular brake inspections are crucial for safe driving and vehicle reliability.
How to Measure Brake Pad Thickness Accurately
Measuring brake pad thickness is a crucial aspect of brake system inspection. Using basic tools, you can ensure your vehicle’s braking performance remains optimal. To accurately measure the thickness of your brake pads, follow these steps.
First, gather your tools. You will need a caliper or a ruler, a flashlight for better visibility, and gloves to keep your hands clean. If you’re using a caliper, ensure it is set to measure in millimeters or inches, depending on your preference. This will allow for precise measurements.
Next, safely lift the vehicle using a jack and secure it with jack stands. Rotate the wheel to access the brake pad easily. It’s essential to inspect both the inner and outer pads, as wear may not be uniform. Use a flashlight to illuminate the area for a clearer view.
When measuring the thickness of the brake pads, place the caliper or ruler on the friction material, avoiding contact with the backing plate. Take note of the measurement at the thickest part of the pad. If you’re using a ruler, make sure to read at eye level to avoid parallax errors.
For accurate results, compare your measurements to the manufacturer’s specifications. Generally, brake pads should have a minimum thickness of 3mm to function effectively. If the thickness is less than this, it’s time to consider replacement. Keep in mind that consistently monitoring brake pad thickness will contribute to the overall safety of your vehicle.
Finally, document your findings for future reference. Regular inspection of your brake system not only ensures safety but also helps in maintaining the longevity of your vehicle’s components.
Identifying Worn Brake Rotors Using Simple Techniques
Inspecting brake rotors is crucial for maintaining vehicle safety and performance. Using basic tools, you can easily identify signs of wear and determine if replacement is necessary. Here are some effective techniques to inspect brake rotors:
-
Visual Inspection:
Start by performing a thorough visual inspection of the brake rotors. Look for the following signs:
- Cracks or fractures on the surface
- Rust or corrosion, which indicates deterioration
- Deep grooves or scoring marks
- A thick layer of dust or debris buildup
-
Thickness Measurement:
Use a micrometer or caliper to measure the thickness of the rotors. Check the manufacturer’s specifications for minimum thickness requirements. If the rotors are below this threshold, they should be replaced.
-
Brake Pad Condition:
Inspect the brake pads while assessing the rotors. Worn brake pads can cause uneven wear on the rotors. Look for:
- Excessive wear on the pad material
- Discoloration from overheating
- Uneven wear patterns between inner and outer pads
-
Vibration Test:
While driving, pay attention to any vibrations in the steering wheel or brake pedal when applying the brakes. These vibrations can indicate warped rotors that require further inspection.
-
Noise Check:
Listen for any grinding or squeaking noises when braking. Such sounds often suggest that the brake pads are worn and that the rotors may have sustained damage as a result.
By utilizing these simple inspection techniques with basic tools, you can effectively identify worn brake rotors and ensure safe driving conditions.
Understanding Brake Fluid Condition and Its Impact
Brake fluid plays a crucial role in the overall functionality and safety of brake systems. Its condition directly affects the performance of the brakes. Regular inspection of brake fluid should be part of routine vehicle maintenance to prevent potential failures.
The main purpose of brake fluid is to transfer force from the brake pedal to the brake components. Over time, brake fluid can degrade due to moisture absorption, contamination, and thermal breakdown. This degradation can lead to reduced braking efficiency and even brake failure.
A critical factor in assessing brake fluid condition is its moisture content. Brake fluid is hygroscopic, meaning it naturally absorbs moisture from the environment. The presence of water in brake fluid can lower its boiling point, leading to vapor lock and diminished braking performance, especially under heavy braking conditions.
To better understand the effects of brake fluid condition on the braking system, consider the following table:
| Brake Fluid Condition | Potential Impact |
|---|---|
| Clear and Clean | Optimal performance; efficient force transfer; reliable braking. |
| Cloudy or Dark | Indicates contamination; potential for reduced braking efficiency. |
| High Moisture Content (above 3-4%) | Lower boiling point; increased risk of brake fading and failure. |
| Presence of Debris | Possible internal damage to brake components; inefficient braking. |
To ensure brake fluid is in good condition, regular inspection should include checking the fluid’s color, clarity, and moisture content. This proactive approach will help maintain safe braking performance and extend the lifespan of brake components.
In conclusion, understanding the condition of brake fluid is essential for the reliability and safety of brake systems. Regular checks can prevent costly repairs and unsafe driving conditions.
Common Brake System Issues Found During Inspections
Performing a thorough inspection of the brake system is crucial for maintaining vehicle safety. Several common issues can be identified during these assessments, each requiring prompt attention.
1. Worn Brake Pads: One of the most prevalent issues discovered during a brake inspection is the wear and tear of brake pads. As pads degrade, they become less effective at slowing the vehicle, which can lead to longer stopping distances and decreased overall safety.
2. Leaking Brake Fluid: During an inspection, any signs of brake fluid leakage are taken seriously. Leaks can develop in the brake lines or at the calipers, leading to a significant drop in hydraulic pressure, potentially resulting in brake failure.
3. Corroded Rotors: Brake rotors can experience rust and corrosion, especially in regions with high humidity or where road salt is frequently used. This corrosion can lead to decreased braking efficiency and uneven wear, which may require resurfacing or replacement of the rotors.
4. Faulty Brake Calipers: Inspectors often find issues with brake calipers, which can stick or fail to apply pressure correctly. This malfunction can cause uneven braking and excessive wear on the pads, compromising the vehicle’s ability to stop smoothly.
5. Incorrect Brake Fluid Levels: During an inspection, it’s essential to check brake fluid levels. Low fluid can signify a leak or worn components, while contaminated fluid can lead to brake line issues and a decrease in braking performance.
6. Brake Line Deterioration: Brake lines can become brittle over time due to environmental factors or road debris. Cracks or bulges in the lines can lead to fluid leaks, making it critical to inspect them regularly to ensure they are in good condition.
7. ABS Malfunctions: When conducting a brake system inspection, any alerts from the Anti-lock Braking System (ABS) should be addressed. ABS problems can hinder controllability in slippery conditions, significantly affecting safety.
By identifying these common brake issues during an inspection, vehicle owners can take necessary steps to address them before they escalate into more serious problems, ensuring a safe driving experience.