

When it comes to enhancing the driving experience, one of the most overlooked aspects is the sound quality within the car’s interior. Road noise, engine vibrations, and other external disturbances can significantly detract from the pleasure of your journey. To combat these issues and create a serene environment, it’s essential to explore the best sound deadening materials available on the market.
Modern vehicles are equipped with various components designed to minimize interior noise, yet many drivers seek additional solutions for a quieter ride. By investing in effective sound deadening materials, you can improve both comfort and the overall acoustic performance of your vehicle. From mats to sprays, different products cater to specific needs and can be tailored to fit your car’s unique design.
This article will delve into the top sound deadening materials, exploring their properties, installation methods, and benefits. Whether you’re a daily commuter or a weekend road-tripper, understanding these options will help you enjoy a more peaceful driving experience.
Understanding Different Types of Sound Deadening Materials
Sound deadening materials are essential for creating a quieter and more comfortable interior in vehicles. These materials work by absorbing vibrations and reducing noise from the outside environment, leading to a more enjoyable driving experience. There are several types of sound deadening materials available, each with its unique properties and applications.
One common type is mass-loaded vinyl (MLV), which is a dense material that effectively blocks sound. It is often used in various areas of a vehicle, including floors and doors, to minimize noise transmission. MLV is particularly effective due to its weight, which contributes to its ability to impede sound waves.
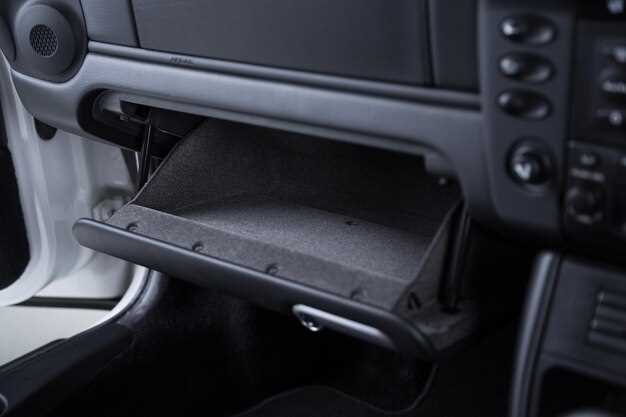
Another popular option is butyl rubber, known for its excellent damping properties. This material is typically applied as sheets or mats, particularly in areas like the doors, trunk, and interior panels. Butyl rubber is flexible and adheres well to surfaces, making it ideal for reducing vibrations that contribute to noise levels.
Acoustic foam is also utilized for sound deadening, though it serves a slightly different purpose. This material absorbs sound waves rather than blocking them. It’s often used in conjunction with other sound deadening materials to enhance the overall noise reduction in a vehicle’s interior. Acoustic foam can be applied to areas like the roof and behind panels to improve sound quality and clarity within the cabin.
Another noteworthy material is closed-cell spray foam, which can be used to fill cavities in the vehicle’s structure. This type of sound deadening material not only reduces noise but also provides thermal insulation. As it expands upon application, it fills gaps that could allow sound to penetrate, making it an effective choice for diminishing unwanted noise.
Finally, there are sound deadening mats, which typically combine layers of materials to maximize noise reduction. These mats are versatile and can be applied to various parts of the vehicle. They are designed to absorb sound, block vibrations, and provide additional benefits, such as thermal insulation.
Understanding these different types of sound deadening materials enables vehicle owners to make informed decisions about which products to use for optimizing their car’s interior acoustics. By selecting the right combination of materials, one can significantly enhance the driving experience by minimizing external noise and vibrations.
How to Choose the Right Material for Your Vehicle
Selecting the appropriate sound deadening material for your vehicle is crucial for achieving a quieter and more enjoyable ride. Consider factors such as the type of sound you want to reduce, whether it’s road noise, engine noise, or vibrations. Each material offers different levels of effectiveness against specific sound frequencies.
Evaluate the interior space of your vehicle. Some materials work better in larger areas, while others are ideal for smaller, targeted applications. For instance, mass loaded vinyl is excellent for expansive surfaces, whereas acoustic foam can be effective for smaller cavities or door panels.
Look into the installation process. Some sound deadening materials require professional installation, while others can be applied easily with minimal tools. Self-adhesive options are user-friendly and can save time and money. Ensure that you are comfortable with the installation requirements before making a choice.
Also, consider the weight of the material. Heavier materials may provide superior sound dampening, but they can also affect fuel efficiency and handling. Striking a balance between weight and sound absorption is key to enhancing both comfort and performance.
Finally, research the long-term durability of the materials you are considering. Quality options will maintain their effectiveness over time, ensuring continuous sound reduction. Look for products that are resistant to moisture and temperature fluctuations to guarantee longevity and effectiveness in various driving conditions.
Step-by-Step Guide to Applying Sound Deadening Materials
Applying sound deadening materials is a crucial step for enhancing the interior comfort of your vehicle. Follow this detailed guide to effectively reduce noise and vibrations in your car.
Materials Needed:
- Sound deadening mats
- Utility knife or scissors
- Roller tool for applying pressure
- Cleaning supplies (rags, mild detergent)
- Measuring tape
- Pencil or marker
Step 1: Clean the Interior Surface
Before applying sound deadening materials, ensure that the surfaces are clean and dry. Use a mild detergent and rags to remove dirt and grime from areas like the floor, doors, and trunk. This will help the adhesive bond effectively.
Step 2: Measure and Cut the Material
Measure the areas where you plan to install the sound deadening material. Use a measuring tape and mark the dimensions on the sound deadening mats. Carefully cut the materials with a utility knife or scissors, ensuring a snug fit.
Step 3: Apply the Sound Deadening Material
Peel off the backing of the sound deadening mat and apply it to the designated area. Start from one corner and gradually work your way across. Press firmly to eliminate air pockets. Utilizing a roller tool can enhance adhesion by applying more pressure.
Step 4: Cover Additional Areas
Consider applying sound deadening materials to other areas, such as the doors, trunk, and roof, to maximize sound insulation. Repeat the measuring, cutting, and applying process for these sections. Each additional layer can contribute to a quieter interior.
Step 5: Reassemble and Test
Once you have completed the installation, reassemble any components removed during the process, such as seats and panels. Take your car for a test drive to assess the improvement in sound dampening. Listen carefully for any remaining noise and consider adding more material if necessary.
| Area | Recommended Material |
|---|---|
| Floor | Thick sound deadening mats |
| Doors | Self-adhesive sheets |
| Trunk | High-density foam |
| Roof | Aero-mat material |
By following these steps, you can significantly enhance the sound insulation of your vehicle, leading to a more pleasant driving experience.
Impact of Sound Deadening on Your Car’s Weight and Performance
Sound deadening materials can significantly improve the driving experience by reducing noise and vibrations within the car’s interior. However, they also introduce considerations regarding weight and overall performance.
When choosing sound deadening materials, it’s essential to weigh their benefits against the additional weight they may add to your vehicle. Here are some key factors to consider:
- Material Weight: Different sound deadening materials vary in weight. For instance, mass-loaded vinyl (MLV) is heavier compared to foam-based options, which may impact the overall weight of the vehicle.
- Distribution of Weight: The placement of sound deadening materials can affect weight distribution. Properly installed materials can enhance stability, while improper placement may lead to an uneven weight distribution that affects handling.
- Performance Impact: While additional weight from sound deadening materials can slightly affect acceleration and fuel efficiency, the reduction in noise can lead to a more comfortable driving experience. This comfort can enhance focus on driving, potentially improving performance in terms of safety and control.
It is important to balance sound deadening strategies with the vehicle’s overall design and purpose. Consider the following:
- Type of Vehicle: For sports cars, reducing weight may be a priority, while luxury vehicles may prioritize a quieter interior.
- Driving Conditions: If noise from the road or engine is significant in your typical driving environment, sound deadening may take precedence over weight considerations.
- Material Type: Selecting lighter sound deadening options such as high-density foam can help minimize weight impact while still enhancing sound absorption.
Ultimately, the impact of sound deadening on your car’s weight and performance is multifaceted. Adequate research and thoughtful application can yield a quieter, more enjoyable ride without severely compromising performance.
Cost Analysis of Popular Sound Deadening Solutions
When it comes to enhancing the auditory experience within a vehicle, several sound deadening materials offer various costs and benefits. Understanding these options helps car owners make informed decisions regarding their soundproofing needs.
One of the most commonly used materials is mass loaded vinyl (MLV). This solution typically costs between $1.50 to $3.00 per square foot. MLV is effective due to its density, which helps in blocking sound waves, making it a solid option for reducing noise from the outside environment.
Another popular choice is acoustic foam. Priced around $0.50 to $2.00 per square foot, acoustic foam provides sound absorption properties rather than sound blocking. It is ideal for reducing echoes and improving the overall acoustics inside the vehicle, although it may not be as effective against external noise as MLV.
Butyl rubber mats present another viable option, ranging from $0.80 to $2.50 per square foot. These mats are often used to cover larger areas of the car and provide excellent vibration damping. Their heavy weight ensures that sound is reduced significantly, particularly frequencies associated with engine noise and road vibrations.
Self-adhesive sound deadening sheets are gaining popularity due to their ease of installation. The cost for such sheets generally varies from $0.80 to $3.50 per square foot. While slightly more expensive, these sheets offer good overall sound reduction capabilities and are simple to apply in confined spaces.
Lastly, professional installation can add substantial costs ranging from $300 to $1,000 depending on the extent of the work needed and the materials chosen. Many consumers may opt for a DIY approach to save on labor, but thorough research on installation techniques is crucial to ensure maximum effectiveness of the sound deadening materials.
In summary, the landscape of sound deadening materials presents a variety of cost options. From budget-friendly acoustic foam to premium butyl rubber mats, understanding the trade-offs between price, performance, and application is key to achieving a quieter car ride.
Maintenance Tips for Long-lasting Sound Deadening Results
To ensure the effectiveness of sound deadening materials in your vehicle’s interior, regular maintenance is essential. Begin with periodic inspections of the deadening layers to identify any areas showing signs of wear or damage. This proactive approach will help you address potential issues before they worsen, maintaining optimal sound insulation.
Cleaning is another crucial aspect. Avoid using harsh chemicals that could degrade the deadening materials. Instead, use a mild cleaning solution and a soft cloth to gently wipe down surfaces in the interior where sound deadening has been applied. This practice not only keeps the materials in good condition but also enhances their performance.
Additionally, monitor the environmental conditions inside your vehicle. Extreme temperatures and excessive moisture can affect the integrity of sound deadening materials. Whenever possible, park your car in a shaded area or use sunshades to protect the interior from harsh sunlight. This simple step can prolong the life of your sound deadening layers.
Finally, consider reapplying or upgrading your sound deadening materials over time. As your vehicle ages, certain areas may become less effective at insulating sound. Investing in high-quality products or adding layers in critical regions can dramatically improve your riding experience and ensure that your efforts in sound deadening yield long-lasting results.