

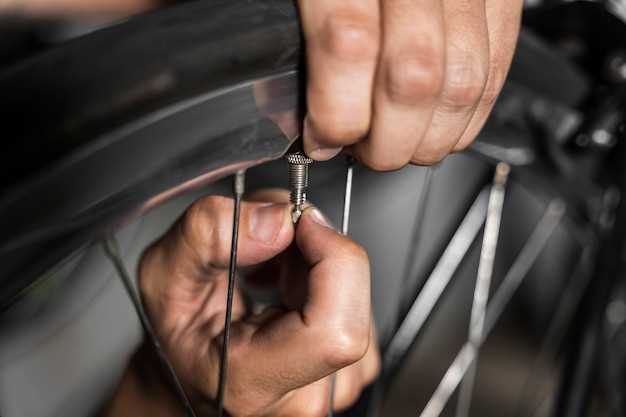
When it comes to enhancing your vehicle’s visibility and safety on the road, auxiliary lights play a crucial role. These additional lighting options can provide brighter illumination in various driving conditions, such as fog, heavy rain, or off-road adventures. Understanding how to properly wire these lights is essential for their optimal performance and reliability.
In this guide, we will simplify the process of wiring auxiliary lights for your vehicle. Whether you’re a seasoned DIY enthusiast or a beginner looking to improve your vehicle’s functionality, we’ll provide clear and concise instructions to help you navigate through the installation. Our focus will be on the necessary components, tools, and methods to safely and effectively wire these lights without complications.
By the end of this article, you will have the knowledge and confidence to install auxiliary lights on your vehicle while ensuring that they comply with local regulations. Get ready to brighten your driving experience and enhance your vehicle’s capabilities!
Choosing the Right Auxiliary Lights for Your Vehicle
Selecting the appropriate auxiliary lights for your vehicle is essential for enhancing visibility and safety during nighttime driving or adverse weather conditions. Start by determining the primary purpose of the lights. If you mostly drive on highways, consider LED light bars for a broader beam, which provides excellent illumination at greater distances. For off-road adventures, spot lights can be beneficial for focused light on obstacles, while flood lights can illuminate wider areas nearby.
Next, consider the brightness and wattage of the lights, which are measured in lumens. A higher lumen count means brighter lights, but balance this with your specific needs to avoid overwhelming glare. Also, take into account the light color temperature; a cooler temperature (around 6000K) mimics daylight and can enhance visibility compared to warmer hues.
The mounting options for auxiliary lights are also crucial. Ensure that the lights you choose can be easily mounted on your vehicle, whether on the roof, bumper, or elsewhere. Verify compatibility with your vehicle’s design to avoid any installation difficulties. Additionally, pay attention to the lights’ durability rating; aim for models that are waterproof and built to withstand tough environments.
Finally, make sure to review local laws and regulations regarding auxiliary lights. Some jurisdictions have specific limits on the type and brightness of lights that can be used, especially for street-legal vehicles. By carefully considering these factors, you can effectively choose auxiliary lights that not only enhance your driving experience but also comply with legal requirements.
Understanding the Wiring Diagram for Auxiliary Lights
A wiring diagram serves as a blueprint for installing auxiliary lights in your vehicle. It visually represents the connections between different components, helping you understand how power flows and how various parts interact with each other.
Firstly, identify the main components depicted in the wiring diagram, including the auxiliary lights, switch, relay, fuse, and power source. Each of these elements plays a critical role in ensuring that the lights operate safely and effectively.
The diagram typically shows the lights connected to a relay, which acts as a switch controlled by a lower-voltage signal from the light switch in the vehicle’s cabin. This setup allows for higher voltage to be used for the lights while keeping the control circuit safe and manageable.
Furthermore, pay attention to the color-coded wiring indicated in the diagram. Different colors usually represent various functions: for example, red may indicate positive power, while black often represents ground. Knowing the function of each wire simplifies the installation process and reduces the risk of errors.
Understanding the fuse’s placement in the diagram is also crucial, as it protects the wiring and lights from overcurrent situations. Make sure to select a fuse with an appropriate rating to ensure both safety and functionality of the auxiliary lights.
Finally, follow the wiring diagram closely during installation. Double-check each connection and the routing of wires to ensure there are no loose ends or chances of interference with other vehicle systems. A clear understanding of the wiring diagram will lead to a successful and efficient installation of auxiliary lights on your vehicle.
Gathering Necessary Tools for Wiring Auxiliary Lights

Before you begin the process of wiring auxiliary lights onto your vehicle, it’s essential to gather all the necessary tools. Having the right equipment at hand can ensure a smooth installation and reliable performance of your lights.
| Tool | Purpose |
|---|---|
| Wire Strippers | Used to remove insulation from wires for a secure connection. |
| Soldering Iron | Enables strong electrical connections between wires. |
| Heat Shrink Tubing | Provides insulation and protection for soldered connections. |
| Electrical Tape | Used for additional insulation and securing connections. |
| Multi-tool or Wire Cutters | For cutting wires to the appropriate lengths and trimming excess. |
| Drill with Bits | To create mounting holes for the auxiliary lights. |
| Socket Wrench Set | Required to install brackets and fixtures for lights. |
| Voltage Tester | Ensures that wires are live before making connections. |
| Wire Connectors | Allows for quick connections and disconnections of wires. |
By ensuring that you have these tools, you will be well-prepared to wire auxiliary lights effectively and safely. Proper preparation is key to achieving optimal results and enhancing your vehicle’s lighting capabilities.
Step-by-Step Wiring Process for Auxiliary Lights
Wiring auxiliary lights to your vehicle can enhance visibility and safety during nighttime or challenging driving conditions. Follow this straightforward guide to ensure a successful installation.
Step 1: Gather Your Tools and Materials
Before starting, collect the necessary tools and materials, which typically include a wiring harness, fuse, relay, switch, connectors, wire strippers, and electrical tape. Make sure you have the appropriate auxiliary lights that meet your vehicle’s specifications.
Step 2: Plan Your Wiring Route
Determine the best route for the wiring from the battery to the auxiliary light locations. Avoid areas exposed to extreme heat or moving parts. Use zip ties to secure the wiring along the chosen path, ensuring it won’t interfere with any vehicle operations.
Step 3: Install the Relay
Locate a suitable area near the battery to mount the relay. Connect the positive terminal of the battery to the relay with a thick wire. This connection will provide power to the auxiliary lights. Also, connect a ground wire from the relay to a proper grounding point on the vehicle’s chassis.
Step 4: Connect the Switch
Install the switch in a convenient location inside the vehicle. Run a wire from the relay to the switch, ensuring it is easily accessible. Place a fuse holder inline to protect the wiring from overcurrent. Connect the power side of the switch to the positive source and the other side back to the relay.
Step 5: Wire the Auxiliary Lights
Using the wiring harness, connect the positive wire to the auxiliary lights and route the ground wire to the vehicle ground. Make sure all connections are secure and insulated with connectors and electrical tape to prevent short circuits.
Step 6: Testing the Installation
Before finalizing your installation, test the auxiliary lights. Reconnect the battery and switch on the auxiliary lights to ensure they illuminate correctly. If they do not function, double-check all connections for accuracy.
Step 7: Finalize and Secure All Wiring
Once everything has been tested, secure the wiring with zip ties and ensure that it does not obstruct any moving parts or components. Recheck all connections for safety and functionality.
Following this step-by-step process will allow for a clean and effective installation of your auxiliary lights, enhancing your vehicle’s lighting capabilities efficiently.
Testing Your Auxiliary Lights After Installation
Once you have completed the wiring of your auxiliary lights, it is essential to conduct a thorough test to ensure they function properly. Begin by checking the connections to verify that all wires are secure and correctly attached. A loose or improperly connected wire can prevent the lights from operating as intended.
Next, turn on your vehicle and activate the auxiliary lights using the switch or control you installed. Observe if the lights illuminate as expected. If they do not, double-check the wiring for any potential issues such as fraying, incorrect polarity, or shorts. It may also be helpful to use a multimeter to measure voltage at the lights’ connection points to ensure they are receiving adequate power.
After confirming that the lights turn on, test their brightness and functionality. It’s crucial to evaluate both the high beam and low beam settings if your auxiliary lights have this feature. Make sure to adjust the aim of the lights to avoid blinding other drivers, which can also impact their effectiveness.
Finally, if your auxiliary lights are equipped with additional features such as a flash or strobe function, be sure to verify these settings as well. Proper testing after installation not only ensures optimal performance but also enhances safety while driving at night or in low visibility conditions.
Common Issues and Troubleshooting Wiring Errors
When installing auxiliary lights on your vehicle, wiring errors can lead to various issues that may affect their functionality. Identifying and addressing these common problems is essential for ensuring proper operation.
- Incorrect Wiring Connections: One of the most frequent mistakes is connecting wires incorrectly. To avoid this, double-check the wiring diagram specific to your light model and vehicle.
- Grounding Issues: Poor grounding can result in flickering lights or complete failure. Ensure all ground connections are secure and clean to promote optimal conductivity.
- Burnt Fuses: If auxiliary lights do not turn on, check the vehicle’s fuse box. A blown fuse can cut off power. Replace it with one of the same amperage.
- Faulty Switches: If the lights only work intermittently, test the switches. A worn-out switch may not adequately transmit power. Replace if necessary.
- Wire Damage: Inspect wires for any visible damage such as cuts or frays. Damaged wires can lead to shorts or connection failures. Repair or replace as needed.
To troubleshoot effectively, follow these steps:
- Use a multimeter to check for voltage at various points in the circuit.
- Verify each connection against the wiring diagram.
- Examine the physical condition of all components, including lights, switches, and relays.
- Test the lights individually to isolate the issue.
- Ensure all connections are tight and free from corrosion.
By systematically addressing these common wiring issues, you can successfully resolve problems and ensure your auxiliary lights operate reliably.